How to do bridal makeup step by step with pictures in Pakistan?

Step-by-step easy bridal makeup look for beginners in Pakistan


Bridal makeup is a unique kind of cosmetic done for brides on their wedding day. Its goal is to accentuate their inherent beauty and give them an elegant, timeless look. It concentrates on highlighting the eyes, plumping up the lips, and producing a picture-perfect complexion. 

Throughout the whole wedding day, including the tears, laughs, and dancing, the bridal makeup must remain in place. Thus, from primer to lipstick, long-lasting formulations are crucial for all makeup items.
"A perfect foundation is essential. To do this, use a primer, foundation, concealer, and powder to balance your skin tone and cover up any flaws. Compared to regular looks, bridal eye makeup frequently uses brighter colors and techniques".

Usually, eyeshadows are mixed to create dramatic or smokey effects, while mascara and eyeliner are applied to accentuate and define the lashes. To define the bride's features, contouring and highlighting are essential. While contouring helps sculpt the face and define the jawline, highlighting products draws attention to specific areas such as the nasal bridge, brow bone, and cheekbones.


Bridle Makeup steps:

Bridle makeup involves numerous processes, all covered in detail here step by step.
  • Skin Care
  • Primer
  • Foundation
  • Concealer & Eye primer
  • Contouring
  • Setting Powder
  •  Eye Shadow
  •  Blush
  • Bronzer
  • Highlighter
  • Lipstick

Step 1. Skin Care:


Skincare is the first and most important step in establishing any makeup look. To give you a wonderful base to work with, I always make sure to cleanse the skin completely. It will also ensure that the makeup is maintained throughout the day. I wash myself well and then apply moisturizer. My favorite moisturizer is Hydrating by Bobbi Brown. These, in my opinion, are the best products for hydrating the face and giving it a dewy appearance.

Step 2. Primer:


Applying primer is the second stage in bridle makeup. It is applied on the nose, eyebrows, and cheekbones. Select a primer that addresses the specific issues with your skin. for a matte, long-wearing makeup appearance. There are choices in the product range for brightening, lowering redness, and minimizing pores if you're not going for a matte look. I use my hands to apply all of my primers, which guarantees a full, glowing appearance without streaks. To guarantee that your makeup look will endure through the entire day of wedding festivities, you'll need to start with a solid base, and makeup primer is the best way to do that. Your wedding day is not the time to skip primer, even if you do so the other 364 days of the year.

Step 3. Foundation:


Use the best foundation if you're a bride who wants to seem radiant and like they have natural skin. It leaves a beautiful, delicate matte finish. this appears fantastic on camera. If you'd prefer a more thorough covering. Applying foundation is always tricky; start with a light layer and work your way up with a compact foundation brush. Never begin using too much merchandise.  
Choose a foundation that provides long-lasting coverage so that you appear flawless at the end of your wedding as you did at the beginning. 

Step 4. Concealer & Eye primer:


Apply concealer after applying foundation. Applying makeup involves first applying it to the inner and outer corners of your eyes, then blending it in. I carefully pat the substance upward toward my hairline with my index finger. After that, I'll mask any more trouble spots with concealer. Red patches surround the lips and nose. To have a nice, even base for eyeshadow, I also dab a tiny bit of concealer onto my eyelids.

Step 5. Contouring:


I start most of my brides with contouring. It's a fantastic method to chisel your features and define your face. The Charlotte Tilbury contour wand is my favorite contouring tool.  When applied correctly, its liquid consistency looks incredibly natural and is incredibly easy to blend. To determine how much product I need before beginning, I usually like to apply the product on the back of my hand first. I next take out a big blending brush and give the product a swirl on the back of my hand. Applying the shape to your checks' hollows is the initial step. Sucking is the method to locate the hollows in your cheeks.

Step 6. Setting Powder:


Using a high-quality finishing powder to "set" and seal in all that makeup is one of the most crucial elements in wedding makeup application. Use any top-notch branded powder. This powder is applied to the T-Zone and beneath the eyes.

Step 7. Eye Shadow:

Apply the "mushroom brown" eyeshadow shade first on the left side of the crease line. I begin by spreading this hue over the entire crease, starting right over where we applied the bronzer. This will begin to provide a beautiful smoky appearance. Using my index finger, I apply the lightest cream shade from the Tom Form palette and pat the color to brighten the inner corners. Then, to blend out all of the product and give the eye a gorgeous lift, I use a wide eyeshadow blending brush to sweep across the entire eyelid from the inner corner to the outside corner of my brow. I use the palette's darkest brown shade on the furthest corners of the eyes and

Step 9. Blush:


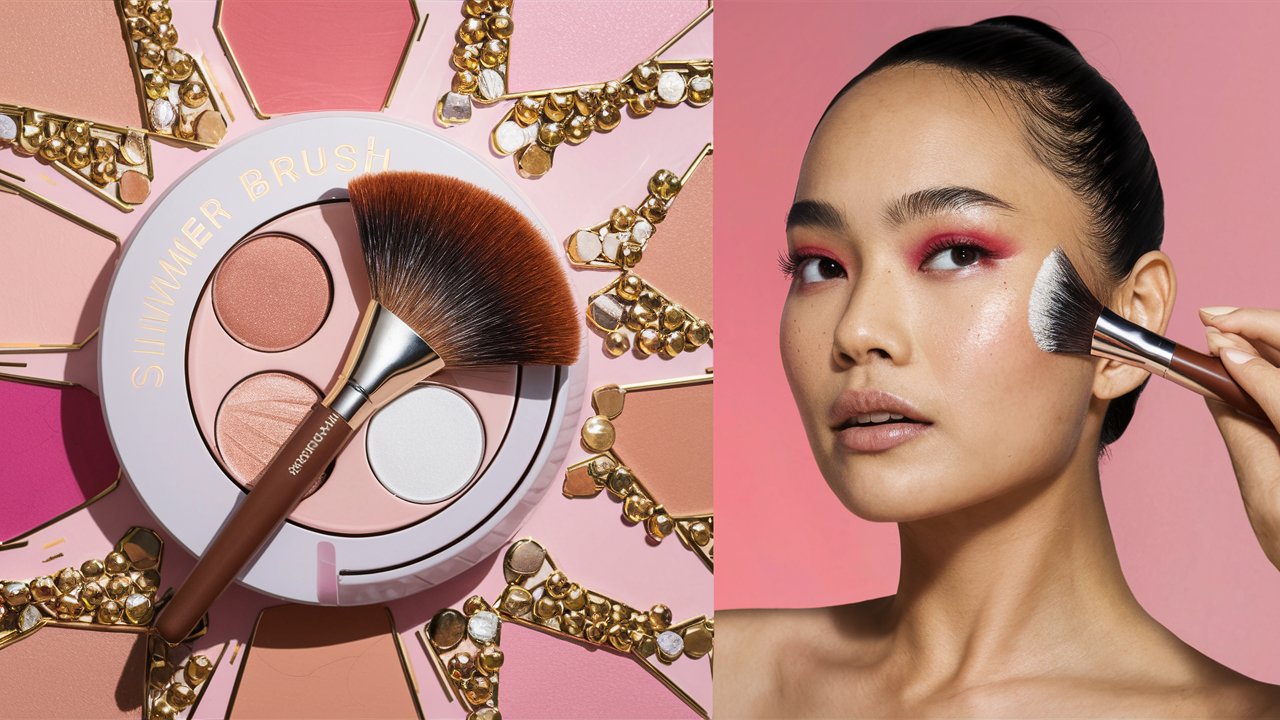
My new go-to bronzer is blush. I'm constantly craving it. I never want to apply too much makeup too quickly while applying blush. Every time I apply blush, I tap off the excess from my blush brush and work my way up towards my hairline, starting with the apples of my cheeks. For my brides, I occasionally also apply it to the nasal bridge for an added sun-kissed appearance. Cream blush and contour creams are our faves when we're attempting to pull off the ever-trendy no-makeup makeup look. Look for a powder composition that blends well with your blush. Its very faint sheen helps to highlight your skin without giving off a glittery vibe.

Step 10. Bronzer:


Bronzer is the next step after blush. Whenever I apply bronzer, I make sure to apply it where the sun naturally shines. a small amount on the forehead, in the area of the cheekbones, and lastly on the chin.

Step 11. Highlighter:


Applying highlighter next, you use the Champagne-colored Hourglass highlighter stick.  Apply this product to the inner corners of your eyes, the cupid's bow, the brow bones, and the high points of your cheekbones. I prefer to apply this on my face with my fingers, mixing it in evenly.

Step 12. Lipstick:


Applying lipstick to the lips is the final step. Choose your go-to lipstick and lipliner color; these complement nearly every skin tone and are ideal for a wedding. Additionally, I always advise my brides to get this essential item so they can keep replenishing it on their wedding day. Additionally, La Bouche Rouge offers an exquisite assortment of lipstick hues. Even online and in-store, you can customize your shade. Their "Nude Pink" tint is my favorite; it's a perfect, subdued pink color for a wedding. I use this on top of my liner and lipstick.


14 Most Popular Foundations for Every Skin Type, According to Makeup Artists

14 different types of foundations and how to pick the best one for your skin tone?

What is the Makeup Foundation?


Face foundation is one of the most important and basic steps in makeup artistry. It can be used to enhance the color of your skin by adding more warmth, toning down redness, etc. This item needs to be the cornerstone of your entire cosmetic look. With the right formula, you can reduce the appearance of defects, hide flaws, even out your skin tone, and produce an overall smooth and even canvas. A good base begins with good skin. The next step is your best cheap foundation with full coverage for daily use and how it works on your skin’s chemistry. So it is important to find what types of foundation makeup coverage is best for your skin.  

Foundation Types for Different Skin Tones:

Not all foundation shades are best for medium skin tones are the same, They vary in function depending on the formulation. There are many types of foundations and here I will discuss each one what’s best for you. 

1. Liquid Foundation
2 . Powder Foundation
3 . Cream Foundation
4 . Stick Foundation
5 . Mineral Powder
6 . Tinted Moisturizer
7 . BB Cream
8 . CC Cream
9 . Airbrush foundation
10. Serum Makeup Foundation
11. Whipped Foundation
12. Anti-Aging Foundation
13. Oil-Based Foundation
14. Waterproof Foundation

Type.1 Liquid Foundation:


This common type of foundation comes in a liquid form and is offered in a range of coverage intensities, from light to full coverage. It is simple to apply with a brush, sponge, or fingertips. Liquid foundation is suitable for most skin types dry, normal, and combo skin included. It can be used to cover up imperfections, even out skin tone, and provide a perfect base for cosmetics. Additionally, it comes in a variety of formulations, including oil-free, matte, and dewy options, to accommodate various skin types and preferences.

Type. 2 Powder Foundation:


The second type of foundation is a powder foundation, which is convenient and easy to apply. It comes in a compact case, which is ideal for oily skin without too many fine lines for those who like a matte look. It looks like real skin when you apply it lightly with a powder brush. It may be applied over a liquid foundation for more coverage, and it's ideal for touch-ups throughout the day.

Type.3 Cream Foundation:


For people who like a dewier finish and have dry skin, a cream foundation is the finest option. The cream evens up the surface and gives the finish a doll-like appearance. Its texture is similar to that of cream or mousse. It provides a smooth, hydrating coverage and can be applied with a brush, sponge, or fingertips. Cream foundation can be used to cover up imperfections, balance out skin tones, and add a dewy, radiant finish to the complexion. It is available in mild to full coverage levels.

Type.4 Stick Foundation:


A stick foundation is a type of foundation shade that is simple to use on the skin and comes in a solid stick form. A cream comes in a stick, bottle, pot, or compact. The consistency tends to be a bit thicker, so it’s important to find your ideal shade. If covering blemishes is your main goal, a stick foundation could be for you. Since it comes in an easy-to-use stick format, it’s great for slipping into your purse or makeup bag.  Stick foundations can also be applied as concealers to larger areas of the skin if you prefer a cream formulation to liquid. Instead, do a light layer of dewy foundation all over, and then build up the coverage only in the specific areas that need it. Stick foundation can be used as a smooth base for makeup, to hide flaws, and to even out skin tone. It's also practical for touch-ups while on the go and is perfect for those with a combination or oily complexion. While some stick benefits of foundation makeup are designed to have a matte finish, others have a more dewy or organic look.

Type.5 Mineral Powder:


Mineral powder foundation is a type of foundation that offers a natural-looking finish and is manufactured with natural minerals like zinc oxide and titanium dioxide. This type of foundation skin tone chart is loose and typically comes in a sifter.it is free of harsh chemicals and scents that might irritate the skin, and it is excellent for persons with sensitive or acne-prone skin. Mineral powder foundation can be applied with a brush for a natural-looking finish and comes in a range of coverage intensities, from light to full. Due to its ability to absorb excess oil and give skin a matte appearance, it is also appropriate for those with oily or mixed skin. It's best used during your morning routine to set your makeup; swap in a powder compact for touch-ups during the day.

Type. 6 Tinted Moisturizer:


A tinted moisturizer is a form of foundation that hydrates the skin while offering thin, light coverage. It helps hydrate and soothe the skin, making it ideal for people with dry or aged skin. A natural, little makeup appearance is also acceptable and can be achieved with tinted moisturizer. It's simple to apply with your fingertips or a sponge and gives skin a dewy, organic appearance. Some tinted moisturizers provide SPF, which makes them a great option for daily usage. This is also a great lightweight option for summer.

Type.7 BB Cream:

A form of tinted moisturizer that offers coverage, moisture, and sun protection is known as BB cream, often referred to as beauty balm. It's a multipurpose product that combines numerous steps into one to streamline your cosmetic application. SPF is typically used in BB creams to protect skin from UV rays, along with antioxidants and other skincare compounds to hydrate and brighten the skin. It offers sheer to medium coverage and is excellent for those who prefer a finish that looks natural. All skin types can use BB cream, which can be applied with either fingers or a sponge.

Type. 8 CC Cream:

CC cream is a kind of foundation made to even out the color of the skin by reducing redness, dullness, and other flaws. It offers a more focused method of coverage than BB cream and is perfect for people with particular skin issues. Each shade of CC cream is intended to address a particular issue, such as redness, sallowness, or black spots. Moreover, it is lightweight and offers a natural-looking finish, making it appropriate for daily wear. Hyaluronic acid and vitamin C are two skincare components that are frequently found in CC creams to enhance the overall health and look of the skin. These lotions usually have anti-aging chemicals and are highly moisturizing. CC creams, like their alphabetical precursor, can aid in achieving an even skin tone for a youthful, radiant appearance.

Type. 9 Airbrush foundation:

Airbrush foundation can either be silicone-based or water-based. It’s called airbrush makeup foundation because it uses an airbrush gun that deposits the foundation in microns throughout the skin making it appear smoother and lasting longer throughout the day. Although most users of this product are professional makeup artists, its application is not restricted to the industry. I primarily use it for my bridal assignments because it takes good photos and lasts the entire day without requiring repeated touch-ups. Skin that is hydrated and well-moisturized is ideal for applying airbrush makeup. Applying this makeup on dry skin may make it appear a little flaky because it's not as creamy or buildable as other kinds.

Type.10 Serum Makeup Foundation:


Serum Foundation is another breakthrough product for the cosmetics industry. The serum foundation can be ideal for you if you desire greater coverage but still enjoy the airy feel of tinted moisturizers. Delivered in a highly fluid mixture, high-intensity pigments are said to seem airbrushed after they set. Some have benefits for skincare in every drop as well. 

Type.11 Whipped Foundation:


If you’re looking for consistency between liquid and cream foundation, you can try whipped or mousse foundation. Just like whipped cream, it feels light and airy when applied. The weightless feel allows for a smooth application which results in a matte finish. It works well for most skin types, but it’s especially great for people with combination skin. It can provide mild to complete coverage, depending on your application. Although some varieties are also packaged in bottles, it is mostly supplied in jars.

Type.12 Anti-Aging Foundation:


Why limit skincare to the evening when you can have it all day long? If you’re starting to notice fine lines, dullness, and wrinkles, then you may want to start using an anti-aging foundation. Although the majority of anti-aging foundations have a liquid or serum-like appearance, they are packed with active chemicals to help prevent obvious indications of aging skin. Seek a foundation that contains hyaluronic acid, retinol, vitamin E, vitamin A, and vitamin C. Therefore, if you're concerned about the aging of your skin, acquire makeup that makes you appear younger on the inside.

Type. 13 Oil-Based Foundation:


The oil-based foundation is perfect for older women or those with dry skin. It provides a deep hydrating effect that other kinds of makeup foundations cannot. However, you have to use it with caution. Since the oil will rise to the top in the bottle if it is left to sit for a long time, the foundation can make the skin look greasy if it is not shaken up before use or if it is not applied properly. Just remember to shake before use and apply evenly, though, and oil-based makeup will provide a youthful glow uncommon in most other makeup foundation types.

Type .14 Waterproof Foundation:


Waterproof makeup foundation is used in a hot climate where you’ll be sweating a lot, It will wash off most types of makeup foundation. Not so with waterproof foundations. Waterproof foundations can take quite a beating. Not only can they withstand the elements, but they can be used for all skin types. They’re available in both cream and liquid forms, and they’re available in countless different shades. They don’t provide as elegant a finish as most shades are best for medium skin tones, but they offer so many other benefits that we’ll give them a pass.

What is makeup & how to apply makeup step by step beginners as a professional Artist?

How can I make my makeup look professional?


What is the history of makeup? 

Since the Christian Egyptians believed that makeup was divinely acceptable and would please God, they invented simple makeup steps at home in about 6000 BC. Every social group's men and women use the list of makeup products step-by-step. What is the basic natural makeup list step-by-step word's descriptive history? The verb is the source of this word. In theater, this word was employed. The actors had to avoid using cosmetics on their appearances. It was eventually referred to as cosmetic. Our go-to makeup products enable us to achieve this gorgeous look. 

What is makeup? 


In our lives, a full glam makeup tutorial step by step for beginners with pictures is really necessary. Makeup highlights our best features and captures our ideas of what beauty is. Modern ladies can feel more confident in the world with the aid of the best beauty products. You can achieve the desired beauty using makeup. Look for natural makeup that enhances the color and beauty of your skin throughout the day. Applying the right amount and technique to your favorite makeup products, from liquid foundation to liner, will help you achieve a faultless appearance that you'll be happy with. You can worry about having a cute look with the help of how to apply makeup step by step like a professional. 

Correct Order of Makeup: 

Here we discussed step by step all the processes of makeup: 

  • Skin Moisturizing
  • Primer
  • Foundation
  • Concealer
  • Powder
  • Bronzer
  • Blush
  • Hiliter
  • Eyeshadow
  • Liner
  • Mascara
  • Lipstik
  • Setting spray

Step 1. Skin Moisturizing: 


Moisturizing the skin on the face is the first step in applying makeup. Apply moisturizer based on your skin type, oily, dry, or normal.

Step 2.Primer: 


Step two After thoroughly moisturizing your skin, apply primer on your face. When applying professional makeup that lasts and looks gorgeous, primer should always be applied before any makeup is applied. Apply a tiny bit of primer to your face using your fingertips, a brush, or a sponge. The primer is designed to produce soft skin by filling in creases in the skin. It must constantly be thin and devoid of grease. Applying it will extend the wear of cosmetics.  

Step 3. Foundation:


The third step of makeup is applying foundation. It is always applied according to dry or oily skin.How can i make my makeup look professional at home? The foundation comes in different shades. You should always choose a foundation color that matches your skin tone. It can be thin or thick so some people apply it with their fingers and some use a brush or beauty blenders. It is always applied in the center of the face and blended towards the outside.

Step 4. Concealer:


Concealer is used to hide dark circles and blemishes. It is always used in two shades, one should match your skin tone and one should be lighter than your skin tone. Dark spots are covered with dark concealer. Apply a light concealer to even out the skin tone. It is also applied before & after the foundation.

Step 5. powder:


Face powder is used to lock in the foundation. Face powder can also be applied with a fluffy brush or puff. Apply the powder all over the face with a light duster or brush.

Step 6. bronzer:


Bronzer can make your skin glow in the sunlight. One of the most common bronzer mistakes is choosing a glittery shade. If you're working with bronzer, use a bronzer that's darker than your skin tone. Where does bronzer plating take place? Once you've got a colored bronzer, you can draw it from your forehead along your cheeks. Don't forget the neck area. If you want to add a little more color and fun to your color, blush can be a challenge. Use a dense brush with enough bristles to apply your blush.

Step 7. Blush


Blush is applied to cheekbones and becomes more prominent when you smile. Blush can be of different colors, so you will use it according to the color of your skin tone. Start by applying the blush color from the inner part of the face to the outer part to the temples and blend it. If you want to plump up the cheeks, you'll apply blush in the apple style.

Step 8. Hiliter:


Highlighter is used to enhance the beauty of the face. It will apply on the tip of the nose and along the cheekbones on the part of your face that they want to highlight. It can be in cream or powder form, whichever you prefer to use.

Step 9. Eyeshadow:


Eyeshadow can add interest to your makeup look. Eyeshadows can be any kind of light, dark, smokey you want. Always apply light colors on the eyelids and dark colors on the outside corner. Apply white or golden color on the top of the brows bone and on the inner side of the eyes. 

Step 10. Liner:

Its primary purpose is to make the lashes look lush. It also attention to the eye and can enhance or even change the eye's shape. Eyeliner can be drawn above the upper lashes, below the lower lashes, or even on the water lines of the eyes.

Step 11. Mascara:


Mascara is used to make thick and long eyelashes. First of all, apply a lash primer for extra length and volume. Then, remove it from the tube. Then apply the first coat of mascara to your upper lashes. Next, apply a second coat with a vertical wand. Finally, fan out your lower lashes with the vertical wand.

Step 12. Lipstik:


Lipstick makes makeup a perfect look. Take the required lipstick and lightly swipe the color onto your lips. Start at the center of your lips and work your way out this helps avoid the clownish effect that can occur. Then blend it with the brush for more neatness.


Top 12 Different Types of Makeup Brushes or Tools for Beginners?

Most Important Makeup Brushes, And Their Uses With Pictures?


Brushes are necessary to blend eyeshadow for a smooth appearance, give color and definition to the cheeks, and create a perfect base. Instruments bearing picture names are used in cosmetics applications to improve facial appearance. You will need a few tools or brushes to complete this process. Nothing is complete without different kinds of cosmetic brushes. Applying a list of makeup without a mirror becomes challenging. Applying foundation, blush, mascara, eyeliner, and lipstick requires different makeup brushes for beginners. From 12 makeup brushes and their uses, you can achieve a delicate and polished cosmetic appearance. Every brush is thoroughly explained, with pictures included. There are many types of Brushes.

Types of Brushes:

  • Foundation Brush.
  • Powder Brush.
  • Blush Brush
  • Bronzer Brush
  • Concealer Brush.
  • Contour Brush.
  • Eyeshadow Flat & Blending Brush.
  • Highlighter Brush.
  • Cotton Swabes
  • Liner Brush
  • Mascara Brush
  • Eye Brows Curler

Type1. Foundation Brush:


The foundation is the most fundamental aspect of makeup application. There are numerous types of foundations. It exists in liquid form. It is applied using a flat-top foundation brush, which makes it simple, and quick, and produces immaculate results.

Type 2. Powder Brush:


A round brush is used for powder application. Both pressed powder and loose powder are applied with the help of a round brush and swirled in circles or sweeping strokes until you achieve even coverage.

Type 3. Blush Brushes:


The application of blush varies depending on the features of the face; it brightens, contours, and adds a healthy glow to your features. It is available in two forms: cream and powder. On the cheekbones, blush is applied with round brushes.

Type 4: Bronzer Brush: 


Use a round powder brush for applying bronzer. For the greatest results, select a brush with an extensive surface area that can pick up a lot of material.

Type 5. Concealer Brush:


Select the shade of concealer that most nearly matches your skin tone. Though concealer comes in a variety of shades, the color that works best for you is the one that is flawless and provides good coverage. You'll use light tapping in a circular motion after adjusting the brush to the concealer. For concealer, we typically use synthetic Bristol brushes.

Type 6. Eye Shadow Palette Brush:


Eye makeup begins with a soft brush that is wide enough to cover your eyelids, known as a blending brush. Small eye makeup brushes with intense designs are the greatest and most necessary. Use a small shadow brush to apply highlighter to the inner corners of your eyes, define the edges of your eyelids, and smoke out the lower lash line with eyeshadow.

Type 7. Highlighter Brush:


A pointed highlighter brush can be used to apply both liquid and powder highlighters. Typically, a highlighter is utilized on the cheekbones, nose tip, upper lip, and browbone.

Type 8: Cotton Swabs:


Cotton swabs are also often used in makeup to apply and remove foundation, eyeshadow, lipstick, and eyeliner. They are also useful for cleaning away nail paint that has gotten on the surrounding skin.

Type 9. Eyeliner Brush:


It is simpler to draw wings and apply eyeliner along the lash line when you use an eyeliner brush. Using an eyeliner brush makes it easier to draw wings and apply eyeliner along the lash line. Applying liner above, below, and on the waterline is done with an eyeliner brush. Its major goal is to make the eyes stand out and become appealing, lovely, and distinctive.

Type 10. Mascara Brush:


Mascara determines the color and volume of the lashes. It comes in several colors. It makes eyelashes thicker and darker.

Type 11. Contour Brush:


The cheekbones over the forehead and around the nose are contoured. For finishing, we can utilize blending, foundation, and concealer brushes.

Type 12. Eyelash Curler:


An eyelash curler is a fantastic way to get results right away. The ability to compress and arrange lashes upwards creates the appearance of larger, and brighter eyes. Curlers are a terrific method to get your lashes looking more lifted and curled if you don't wear mascara. It will help give your lashes a more lifted and voluminous appearance by curling them before applying mascara. For optimum results, use an eyelash curler before applying mascara; doing otherwise may result in clumping and damage to your lashes.  

Affiliate Marketing for sales of women Products in Pakistan

Affiliate Marketing for women's Buying and Selling Products Welcome to my page! I am a professional makeup artist with a passion for enh...